Node.JS on Windows Azure Part 2: Building a Basic Web Application with Node.JS on Azure
- Step 1 – Create a New Node Project via Windows Azure PowerShell for Node.JS
- Step 2 – Planning Our Application
- Step3 – Routing and Handling HTTP Requests
- Creating Routes.JS
In the last post in this series on working with Node.JS in Windows Azure I showed you how to set up your development environment for working with Node.JS and Windows Azure. In this post I am going to show you how to write and deploy a simple web application to Windows Azure using Node.
Step 1 – Create a New Node Project via Windows Azure PowerShell for Node.JS
The first thing we need to do is create a new Node.JS project using the Windows Azure PowerShell for Node.JS tools.
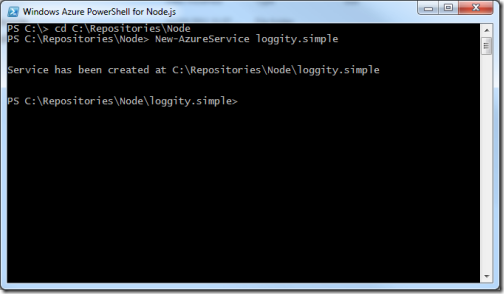
Use the New-AzureService [servicename] command just like how we did in the last part – I named my service “loggity.simple” in this instance.
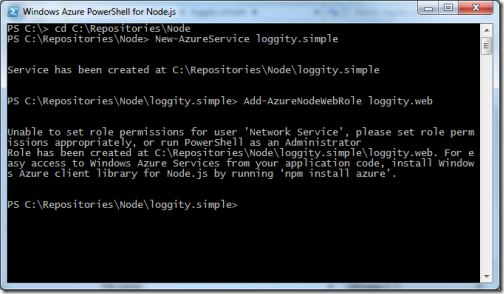
Next, create your Node web service using the Add-AzureNodeWebRole [rolename] – I named my web role “loggity.web.”
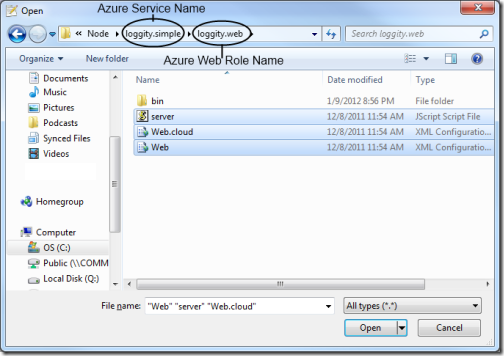
Next, go ahead and open up the [webrole_root]\server.js file in your favorite text editor – I’m using Notepad++ in this instance.
Your server.js file will look like this initially with every new Node WebRole you add to a project:
1 var http = require('http');
2 var port = process.env.port || 1337;
3 http.createServer(function (req, res) {
4     res.writeHead(200, { 'Content-Type': 'text/plain' });
5     res.end('Hello World\n');
6 }).listen(port);
If you run the emulator (Start-AzureEmulator –launch in PowerShell) you’ll see a simple “Hello World” message. This is going to serve as our starting point for building a simple Node application.
Step 2 – Planning Our Application
What I want to be able to build eventually with this loggity web application is a simple, high-throughput message logger for Windows Azure applications.
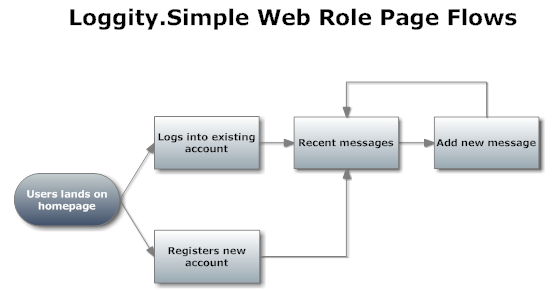
In the short run, we’re going to settle for a simple form-driven application that allows users to register an account and manually log some error messages. Here’s what the page flows look like for this simple example:
So given this page flow diagram, we know that our application needs to be capable of the following:
- Authenticating and authorizing users across sessions, which means:
- Cookies;
- Storing user identity on the server; and
- Encrypting user passwords.
- Saving and recalling user-generated data, which means:
- Handling and validating form submissions; and
- Saving user data on the server.
- Routing users to distinct pages and handling multiple types of HTTP verbs (GET, POST.)
- Serving HTML content to end-users.
Let’s start with the simplest of these four high-level requirements: building a routing system and handling HTTP verbs.
Step3 – Routing and Handling HTTP Requests
The first thing we need to build is an extensible system that will make it easy for us to add routes that support multiple types of HTTP verbs (GET, POST) and additional arguments like querystrings.
So, we need to be able to parse incoming URLs and break them down into their component parts, and this can be accomplished via the built-in url module in Node. Take a look at the modified server.js below:
1 var http = require('http');
2 var url = require('url');
3
4 var port = process.env.port || 1337;
5 http.createServer(function (req, res) {
6     var path = url.parse(req.url).pathname;
7     res.writeHead(200, { 'Content-Type': 'text/plain' });
8     res.end('Hello World\n');
9 }).listen(port);
Check out line 2 and line 6 – what’s different?
On line 2 we’re “requiring” a built-in Node module (“url”) to be used inside this application during run-time and on line 6 we’re using one of the methods of that package to parse the incoming URL into its component parts, extracting the “pathname” part in this instance.
This is our first taste of working with Node’s modules system – in a moment we’re going to create our own module for matching incoming pathnames with functions that can handle them.
Creating Routes.JS
Let’s create a new file in the same root directory as our server.js file and call it routes.js:
1 function route(routemap, pathname, response){
2     console.log("Routing a request to path"
3     + pathname);
4 }


